Showing posts with label Layouts. Show all posts

Friday, November 29, 2013

Colorful Creations Blog Hop ~ Day 2

Hello everyone!

Welcome to the Colorful Creations "Jingle All The Way" Holiday Hop ~ Day 2!!

(Yes, I'm posting early.  Issues with my Blog and not sure how to resolve...
If you have problems while here... I am truly sorry!  Please bare with me!
And, if you have some suggestions on how to resolve it... I'm all ears!)

So... now onto Day 2 of our Hop!

Are you ready for a challenge?  
I have a sketch challenge for you today.

Here's the sketch:
The criteria:  To use a Christmas photo.

That's it!  
Simply use this sketch and add a Christmas photo... and you're in the Challenge!  

This is the layout I created titled, "Oh Christmas Tree."
This is our tree taken several years ago.  I always love to look at the lights and the hundreds of ornaments that take me forever to add  on the tree!  But the end result is so pretty!

Supplies used:
Paper: DCWV, Other
Felt Circle
Pop Dots
Glitter Gems & Swirly Bling: Home Made
Flowers/Leaves
Page Title Sticker: Cosmo Cricket
Glitter Tape
String
EK Success Border Punch
Dome Sticker
Glitter Foam Stockings
Sketch: Cricut Inspired Layout #012

A cluster of gold poinsettia were added at the lower corner of the photo.

Swirly bling flows from the flowers under the photo.

The page title was tucked under the punched border and three tiny glitter foam stockings were added below the title... with tiny bows added at the top of each one.

The circle was cut from felt.  A bit tricky to shape back into a circle... but I got it after awhile.  Three glitter gems were added onto the felt circle at the corner of the photo.  Glitter tape adds just a little more bling to the page.  And... more swirly white bling bursts from the flowers.

More bling was added above the photo.

A closer look at the felt circle and bling.


I hope you enjoyed my layout and I inspired you to start creating!

After completing your layout, add it to the Colorful Creations Gallery using the tag: BHCPhoto.

Here's the prize that will be offered to one random winner: 

To be eligible for the prize, complete the above challenge by December 5th.  
You MUST become a follower of my Blog AND leave a comment in this thread to let me know you're hopping along!
The winner of this challenge will be announced HERE on December 6th... so be sure to check back.  You will have 7 days to contact me and claim your prize.  After 7 days, your prize will be forfeited and another name will be drawn.
If your name was chosen, please email me at:  pbllib(at)myfairpoint(dot)net.

Hope to see your layouts in the Gallery!

This is the blog lineup in case you get lost along the way:


Be sure to check each blog every day for more holiday inspiration.

Become a member of ALL our blogs and leave a comment daily for a chance to win an AWESOME Grand Prize of scrapping goodies!

Winner of the Grand Prize will be selected from members that comment daily AND complete all of the challenges by Thursday, December 5, 2013 - 11:45 pm.  

Remember, individual prizes will be announced on each member's blog.
And, the Grand Prize winner will be announced on the Colorful Creations site on Friday, December 6, 2013.

I hope you are enjoying all the Holiday Inspirations and they help you to get some of those projects completed for Christmas, some new recipes to try and maybe even get a few scrapping projects completed too!

Thanks so much for stopping by!

Colorful Creations Design Team Member


Wednesday, November 27, 2013

Happy Everything Christmas Layout

Hello,

I have another layout to share with you today that was submitted at Colorful Creations for their Guest Designer Sketch Challenge (GDTDEC13).  You can see the challenge here.

This is the sketch:

And here's my layout titled, "Happy Everything."
Here's a few photos from Christmas past that I came across in my stash and had to scrap them!
This is our daughter and son having fun opening their presents on Christmas morning.

Supplies used:
Paper: DCWV
Stampin' Up! Border Punch
Decorative Trim
Clear Stickers
Die Cuts
Ribbon

To create the circle with trim... I simply lay down the circle size that I want and adhere the trim around it.  Super easy!  Without doing this... my circles would be a disaster!

The holly leaves were cut from pp and the page title was matted on pp.  A bow was added above the title to help to see it more easily. 

The snowman clear sticker was adhered onto paper and trimmed before adhering to the page.  A clear snowflake sticker was also added beside the snowman.

Here's a closer look at the trim.

And another look at the trim above the photos.

Thanks so much for stopping by! 
Colorful Creations Design Team Member


Christmas Layout

Hi there,

Here's a layout that was submitted at Soul Scrappers for their Negative Space Sketch Challenge (NSC30).  You can see the challenge here.

This is the sketch:

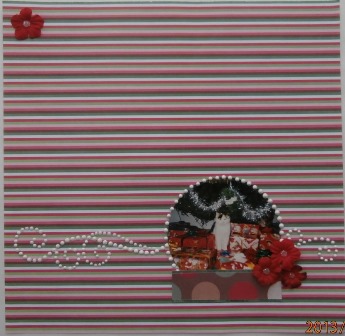
And here's my Christmas layout:
This is a cute photo of our cat from years ago.  Her name was Fluff and she loved sitting among the presents under the tree.

I followed the sketch... but didn't want to add journaling.

Supplies used:
Paper: DCWV
Flowers
Gems & Swirly Bling: Home Made

Here's a closer look at the "snow globe."  I added a circle of bling around the photo with swirly bling along each side of it.

Love this bling!  :) 

Smaller swirls of bling were added on the right of the photo.  Three small flowers and clear glitter gems finished off the page.

Thanks so much for stopping by! 
Soul Scrappers Design Team Member


Saturday, November 23, 2013

Adventure Bound

Hello,

Just a reminder that the Sketches 4 All 4 year Anniversary Party is going on right now!  Hop on over there and check out all the fun challenges.  And... the more you play along... the more chances you have to win prizes.

Yesterday was Day 1 of our Party... and it was opened up with a sketch challenge (AP1).  You can see the challenge here.  

This is the sketch:

Here's my layout titled, "Adventure Bound."
Andrew snapped this pic of hubby and I on the plane several years ago... headed to visit my sister and her girls.  We had an amazing time!

Supplies used:
Paper: DCWV, Colorbok, Other
Twine: American Crafts
EK Success Border Punch
Martha Stewart Border Punch
Round Sticker: Marcella by K
3D Embellies
Metal Rimmed Embellie
Clear Sticker Page Title
Ribbon
Decorative Edge Scissors
Darice Embossing Folders
Hole Punch

Above the photo are some embellies, twine and embossed papers.

The page title is a clear sticker to the right of the photo.  Some of the papers were cut using edge scissors.  A round sticker was added in the corner of the photo with twine wrapped around the cardstock.

Below the photo are more scrap pieces of papers.  For the banner, I folded the top of it a couple of times, punched a hold and added twine.  A 3D embellies was added near the end of the banner.

Along the right of my page is a punched border with dark blue ribbon tucked under it.

Thanks so much for stopping by!

And don't forget to head on over to Sketches 4 All for a fun P*A*R*T*Y with lots of prizes!!!

Sketches 4 All Design Team Member


Sweet

Hi there,

It's a very windy Saturday here... with a dusting of snow on the ground.
It's inevitable... winter is here!

From my toasty warm house I have a layout to share that was submitted at Colorful Creations for their Sketchy Tuesday Challenge (STNOV).  You can see the challenge here.

The sketch:
  

And here's my layout titled, "Sweet."
I snapped this photo of our daughter just as we entered "The Alamo" in Texas in January.  She was able to go out and about with us seeing the sights.

Supplies used:
Paper: My Mind's Eye
EK Success Border Punch
Flowers
Cuttlebug Embossing Folder
Pink Ink
Gems & Swirly Bling: Home Made
Chipboard Page Title

The half circles and whole circle were embossed and ink lightly rubbed across them to enhance the embossing.
 
A few flowers were added over the circle and banners with some swirly bling.  The page title is chipboard and glitter.

A closer look.


Another cluster of flowers and bling were added on the half circle on the lower portion of my page.

Thanks so much for stopping by!

Colorful Creations Design Team Member


Friday, November 22, 2013

Family

Hi there,

Here's another layout that was submitted at Turtle Soup for their November Mini Crop - Family Challenge.

My layout is appropriately titled, "Family."
Our daughter and grandson... chilling on a hot summer day.  Lynn was testing out Andrew's new camera.

Supplies used:
Paper: Me & My Big Ideas, Colorbok
Ribbon
Flowers
Rick Rack
Bard
Gems: Home Made
Metal Page Title
Circle Punch
EK Success Border Punch
Marker
Sketch: Page Maps (June 2013)

Journaling was added above the photo with a punched border and rick rack. 

Two circles were added under the flower as well as rick rack.  Ribbon was threaded through one end of the metal tag and the other end was placed in the center of the flower with a gem on top.

A closer look at the journaling block.

To the right of the photo is another circle, flowers and rick rack.  The center of the larger flower is a brad.  Ribbon was added across the page below the photo.

Thanks so much for stopping by!