Good morning!
I've been "busy as a bee" working on my sample layout for my very first Quote Challenge on
Soul Scrappers (Aug. 20th). It's frustrating sometimes when you have a plan for the layout, all the photos
needed and the papers and when it actually comes time to begin working on it, nothing is coming together
like you planned. Guess that's just a part of "going with the flow" right?
I did get the layout finished at the end of the day. :)
I feel better knowing that I'm ahead of the game.... somewhat.... because there's still more to do
to prepare for hosting this challenge. But not to worry, all will be good (I have to keep
telling myself this)!!
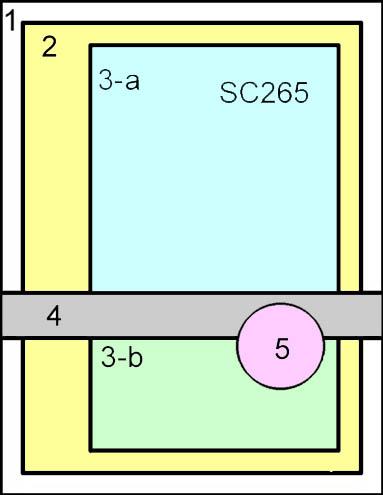
Today, I have a card to show you all. But first, here's the sketch in which I based my
card from (Splitcoast Stampers - SC265), and the direct link to their sketch:

And this is my take, based on the above sketch.
This is a rather simple card with some different (for me) techniques that I've tried
and I really like the results! This sketch was super fun to work with. I'm sure it will
be used again!
Supplies used:
Paper: DCWV, White Cardstock
Gold Stretch Cord
Flower Petals: EK Success Balloon Punch
Various Embossing Folders: Cuttlebug
Sizzix
EK Success Circle Punch
Inks: A la mode Pink, Studio g Blue
Ribbon
Sentiment (unknown)
Banner: Self-adhesive Squares
This cute little flower was made with the balloon punch and circle punch.
So easy! I punched all the "balloons" then adhered them onto a circle then added
another circle punch to the top, in which I inked and finished off with the sentiment.
I don't usually work with banners but I have to say they are growing on me, since there
were several challenges on various sites in which banners had to be used.
I had some self-adhesive 2x2 squares hanging around forever, pulled them out and was pleasantly
surprised that their colors matched with my papers for this card! How often does that happen?
I started off by punching the circles and folded them in half. They looked so "plain" so
each one was embossed with various folders. Then I peeled off the backing of each circle and
folded them around my gold stretch cord. Because the circles were "sticky" made it so
much easier to stick them around the cording and stay in place! Finally, I decided
where I wanted to place the banner and adhered.
Have a wonderful day!
Polly :)
.jpg)
.jpg)
.jpg)
No comments:
Post a Comment