Showing posts with label Page Maps. Show all posts

Thursday, January 17, 2013

Laugh

Hi there,

Here's a layout that was so fun to create, which was submitted at Page Maps for their Fancy Pants Love Note Sketch Contest.

This is the sketch:


And here's how I interpreted the sketch:
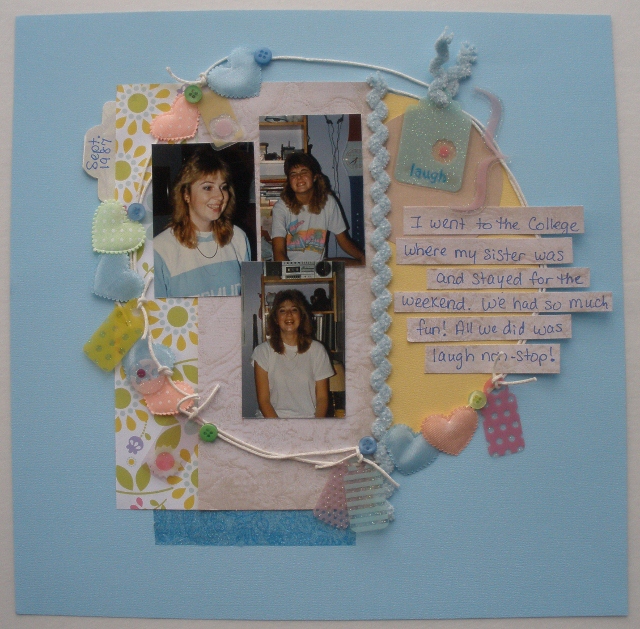
This is my sister and I having fun in her dorm room.  Always laughing going on whenever we're together!

Supplies used:
Paper: Colorbok, DCWV
String
Chenille Rick Rack
Plastic Glitter Tags & Shapes: Making Memories
Buttons
Puffy Fabric Hearts
Washi Tape: Hand Made
Sharpie Marker
Folder Tab: Paper Pizazz

 The letters didn't show up very well, so I used a marker to the letters.
Rather than stitch the circle, I decided to use string for something different.

 
Journaling on strips of paper.  I started off pretty good, but then I started writing closer together, which made it pretty tricky to cut the strips.  It didn't turn out too bad, I guess.  :)
 
 Each tag was tied with string and tiny buttons were added randomly.
 
Once the string was adhered in place, it made it easier to add the embellies.


I used a small strip of washi tape near the bottom of my page.  The next photo shows the glitter of the tape a bit better.  Made with double stick tape, tissue paper, glitter paint and ink and stamps.

 
These two tags were tied together.  

Here's a couple more close ups: 


Thanks for visiting my Blog.

Sunday, December 16, 2012

Fun with the Piggy!

Hello there,
Happy Sunday to you!

Today I'm sharing a layout that was submitted at Page Maps for their "My Little Shoebox Sketch Contest."
I decided to have some fun and play along.

Here's the sketch:


This is what I created:
Photos of my sister's guinea pig.  We would all take turns holding him.  My nieces never really
paid much attention to the little guy, until we visited for two weeks.  He was being held and fed all
the time!  He's the cutest guinea pig and a little character too.  As soon as he would hear the 
refrigerator door open he would get all excited and start squealing for food! 

Supplies used:
Paper: Colorbok, DCWV
Ribbons
Circle Punch: EK Success
Distressing
Sharpie Marker
Chenille Ribbon
Hole Punch
Clear Title Stickers
Tag: Paper Pizazz  

 
After punching the circle, I cut a slit on the page to put the circle through.  Thought that would
be a bit more interesting that just cutting the circle and adhering it to the page.
 
The tag was traced, cut and distressed.  A knotted ribbon was added and finally the journaling.
I decided on journaling the angle of the tag rather than straight across.
 
Clear sticker letters were used for the title.  The banner was distressed, a hole punched in
one end and two ribbons knotted through it.
 
A better view of the distressing and a small strip of ribbon added to the corner.

Thanks for stopping by!
Libby  :)