Showing posts with label KandCo.. Show all posts

Thursday, November 14, 2013

Out on Vacation

Hello,

I have another layout to share with you today that was submitted at Colorful Creations for their Member Spotlight Sketch Challenge (GDTNOV13).  You can see the challenge here.

The sketch:

And my layout titled, "Out on Vacation."
These photos are a couple of the many that I took while on a short trip near the lower portion of our State to see the Observatory.  So cool!

I decided to use two photos rather than the three from the sketch.

Supplies used:
Paper: Me & My Big Ideas, Colorbok
3D Embellies: K&Co.
Ribbon
Darice Embossing Folder
Sticker

In the upper corner I added a couple strip of paper and a sticker.

Ribbon is trailing from the 3D embellie with small banners below the ribbon.

The 3D page title.

The brown cardstock was embossed.

Thanks so much for stopping by! 

Colorful Creations Design Team Member


Saturday, November 9, 2013

Oct 31st

Hello,

I have a Halloween layout to share with you that was submitted at Sketches 4 All for Cheryl's Holiday Challenges - Halloween.  You can see the challenge here.

This is my layout titled, "Oct 31st."
This is Andrew and I all dressed up for a night of Trick-or-Treating.  A good friend and decided to dress up as Raggedy Ann and Andy for Halloween and made our costumes and went to work like this all day!  It was so fun!  And Andrew decided to forgo me making his costume and wanted to wear this cute little Fireman's costume.

Supplies used:
Paper: DCWV
3D Bat: K&Co.
Chipboard Page Title: K&Co.
Ribbon
Journaling Shape: Cut from pp
Ghost Rub on
Chevron Paper Bag
Pumpkin Die Cut
Marker
Sketch: Page Maps (July 2010)

Found this cute little paper bag in my stash and added the rub on ghost at the top.

A closer look at the ghost rub on.

Gotta love K&Co. embellies!  :)

The journaling block was cut from pp with a bow added at the bottom.

Thanks so much for stopping by!

Sketches 4 All Design Team Member


Getting There is Half the Fun

Hello,

Another layout today that was submitted at Sketches 4 All for their Once Upon A Theme - Adventure (THEMEADVENTURE) Challenge.  You can see the challenge here.

My layout is titled, "Getting There is Half the Fun."
The top photo was taken at the visitors station before climbing Katahdin at Baxter State Park.  And the bottom photo was taken at the top.  The whole hike/climb took 11 hours!  It was a LONG day!  We got to see the most amazing views along the way.  A super experience!

Supplies used:
Paper: DCWV
Vellum Quotes: K&Co.
Clear Stickers
Star Die Cut
Tickets
Ribbon
Chipboard Arrow: K&Co.
Sketch: Page Maps (Feb 2010)

Ribbon was tucked under the photo on the left and an arrow added to show we finally made it to the top!

On the circle I added a vellum quote and a clear sticker just above it with a star and crumbled up tickets.  In the very corner I added another word.

The page title is a vellum quote.  It's challenging to find ways to adhere this stuff to my page... without it showing.  I gave up using vellum adhesive... it just doesn't work well for me.

A closer look.

Thanks so much for stopping by!

Sketches 4 All Design Team Member


Delightful

Hi there,

Hope you're all having a wonderful start to the long weekend!

I have a layout to share that was submitted at Colorful Creations for The Theme Park (themeparknovember) Challenge.  You can see the challenge here.

For the month of November... the theme is DELIGHTFUL.

Here's my layout aptly titled, "Delightful."
One of the many favorite photos taken while we were at our daughter's Basic Training graduation.  I was so happy my sister was able to go and meet us there.  What a fun time we had!!  Even though it was a VERY cold day... we still had a good time.

Supplies used:
Paper: K&Co., Colorbok
Ribbon
EK Success Border Punch
Fiskars Border Punch
Swirly Bling: Home Made
Nestabilities Dies
Sticker Page Title
Cardstock Die Cut Strip
Flowers
Gems: Home Made
Sketch: Page Maps (Feb 2010)

I made a heart shape using a transparency, heart template and puffy paint.  Isn't is cute? 

Two border punches were used below the photo and ribbon and bow were added.  The strip under the photo is a cardstock sticker.

Here's my flower cluster.  Various flowers and gems as well as bling were added between the photo and page title.

Another look at the swirly bling and page title.  Since the page title sticker was so small, I matted it on die shapes.

And yet another look.

Thanks so much for stopping by!

Colorful Creations Design Team Member


Thursday, November 7, 2013

Cherish

Hi there,

I have a layout to share that was submitted at Colorful Creations for their Say It With Words - Cherish Challenge (SIWWNOV).  You can see the challenge here.

This is my layout titled, "Cherish."
The challenge word for Nov. is "Cherish" which I used as my page title.

This was such a wonderful time... when our daughter came home after being deployed overseas for six months... and wanted this to be the surprise of her son's life!!  And it was!!  We were so happy to have been a part of this!!  Her friends were too!  It was truly a moment to cherish forever!!

Supplies used:
Paper: Me & My Big Ideas, Colorbok
Darice Embossing Folder
EK Success Border Punch
Glittery Swirls & Flowers
Sentiment Sticker: Marcella By K
Chipboard Arrow: K&Co.
Marker (to color arrow black)
Sketch: Page Maps (Sept 2013)

Love, love, love this glittery swirls... with bling too!
I used a punched border just under the swirls.

The title sticker was matted onto B&W cardstock with two glittery flowers added.

Another look at the beautiful swirls and dimension.

Thanks so much for stopping by!

Colorful Creations Design Team Member


Thursday, October 31, 2013

Tri-fold Birthday Card

Hi there,

Here's the example card that I made for hosting the Libby's Challenges - Using Clusters (novclusters) at Sketches 4 All.  You can see my challenge here.

I sure hope you can play along!  It's super fun... really!

So, basically, the challenge is to create a project using a cluster of 3 or more embellies. 

Clusters can mean a variety of things such as:
- Flowers/Leaves
- Frames
- Tags
- Various Shapes
- Buttons, Brads, Bling
- Photos
- Gears, Chipboard
- Ribbon, Swirls
- Fabric, Lace, Felt
- Beads

Basically, ANY combo of embellies is a cluster.
I challenge you to HAVE SOME FUN and create your own unique "cluster."

This is the tri-fold Birthday card I made.  I have been wanting to make one for some time now... and I should not have waited so long to give it a try!  It was super fun!
Here's the card tied with a bow.  I left it open a bit.

Here's the card opened up.

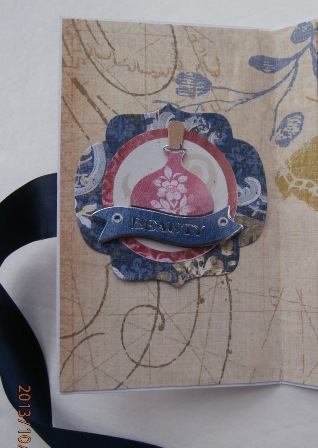
This is the inside center of my card.  
The "cluster" is the 3 flowers and glitter gems.

Left inside flap.  3D embellies were used on each inside flap.

Right inside flap.

The back of my tri-fold.  Ribbon was adhered to the back.  

Outside left flap.

Outside right flap.

And a closer look at the back... including my stamped signatures.


Here's the card standing up.

I hope you enjoyed your visit and will stop in again real soon.
Thanks so much for stopping by!

Sketches 4 All Design Team Member


The Great Outdoors

Hello,

HAPPY HALLOWEEN!!

I have a layout to share that was submitted at Sketches 4 All for The Great Outdoors Challenge (outdoors).  You can see the challenge here.

The challenge is to use outdoor photos, Fall theme and the word "outdoors" somewhere on your project... or show that the photos are outdoors.

Here's my layout titled, "The Great Outdoors."
This is our son and other scouters working hard on an Eagle Scout Project.

I used:
Outdoor photos,
Fall theme,
and the word "outdoors" in my page title.

Supplies used:
Paper: K&Co., Colorbok
Ribbon
Burlap
Vellum Page Title
Raffia
Clear Stickers (trees & word on tag)
Ink: Vivid! Brown
Various Paints
Hole Punch
Sketch: Page Maps (Sept 2005)

Dark brown ribbon was placed under the burlap.  The vellum page title was adhered onto cardstock and the edges were inked.

Journaling was added in the lower right of my page.  The background was made using a new technique (for me).  Simply add drops of paint onto plastic wrap... spritz with water.... play around with the paint, splotching it more... and press your cardstock onto it.  Lift and you have this really cool pattern on your otherwise plain cardstock.

The tag was also inked along the edges.  Clear stickers were added and a piece of burlap string was wrapped around raffia and placed on the tag.

Another look.

Thanks so much for stopping by!

Sketches 4 All Design Team Member