Hey,
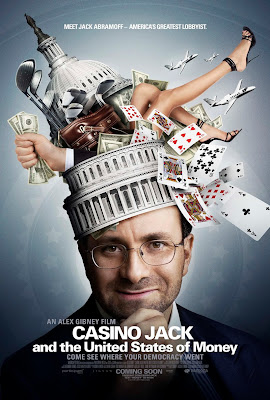
I have another layout to share that was so fun to work with! It was a submission at From Screen 2 Scrap for their February Movie Poster (Casino Jack) Challenge.
Here's the poster:
And the extra criteria:
1 pt. = Grey base cardstock
2 pts. = Playing card(s)
3 pts. = Money notes
At first, I really didn't know what I could create with this poster... until I found this photo of Andrew!!
As I scoured the rows of "stuff" at a local store, I came across a package of large bills and snatched it up, never really thinking I would actually use it... but you never know! The playing cards are extra large (possibly for those people who can't see well). Even though they were rather large, I made them work on my page.
Here's what I created using a sketch from Page Maps:

I'm so lucky to have such creative kids!!
It sure was a challenge trying to tie up this wide black ribbon like in the photo! I think I got close enough though.
Gotta love that smile... so proud of his creation with the "extra" seatbelt!!
I've used all the extra criteria too! Woohoo!
Supplies used:
Paper: Colorbok
Money (not real)
Playing Cards (extra large)
Journaling Block matted on the back of the playing card
Wide Black Ribbon
Sticker Square & Word: BoBunny
Distressing
Title Letter Stickers: Miss Elizabeth's
Ink: A la mode Black
Title matted on playing card
Sharpie Marker
Buckle
Perfect Pearls Mists: Heirloom Gold
.jpg)
I used a playing card for my title block. In the middle of the hearts was enough space to adhere the letters. The edges were distressed and inked. I also brushed the card lightly over ink.
.jpg)
Two cards were tucked under the center paper. I also added a square button photo and the word over that.
.jpg)
My journaling block, which was written on white cardstock and matted on the back of a playing card.
.jpg)
Sure wish I had this money... for REAL!! I'm imagining all the crafting stuff I could buy with just ONE of these bills! :)
All the bills and cardstock were misted with gold... which I thought was appropriate (gold... money...). At least that's how I associate it.
.jpg)
Here's a portion of the ribbon. After knotting it I added the buckle. The ribbon was adhered loosely so there's lots of dimension here.
.jpg)
I added the journaling block on the other part of the knotted ribbon.
.jpg)
Here's a look at the ribbon I tied... I still can't believe it looks like in the photo!!
.jpg)
I went digging through a "misc." box and found this cool buckle. It looks like something Andrew could have made... but then again, maybe not.
.jpg)
Here's a closer look at the stickers which were adhered on cardstock then the edges inked.
.jpg)
Here's a look at the layering above the photo. More money... I wonder if there's any way I can make it REAL? :)
Thanks for visiting my blog!

Very creative and clever Libby!
ReplyDeleteYou have done so well this challenge, great idea, super photo of Andrew being creative with a seatbelt. Well done Libby!
ReplyDeleteGreat page Libby!
ReplyDeleteVery Creative!
Just let you know I have you linked on my blog for the CC hop! :)
I love this page Libby. The photo is inviting & fun, the content really clever & your embellies are so apt. Great work & thanks for playing at FS2S!
ReplyDeleteWhat a fun Page, very creative by add real money. That LO should be worth more than a $150.00 Thanks for playing this month.
ReplyDelete