Hi there,
I was glad to finally get a scrapbook page done today. I started this yesterday and got interrupted, so I couldn't finish it until today. I'm excited to share my layout with you. I love how it turned out. I hope you'll like it too.

This layout was submitted at Soul Scrappers for their SSQ15, It's About Valentine's Day Challenge.
By completing 3 challenges that were currently running at S.S., your name could go on a list. The "list" is the names of everyone who will receive some FREE goodies in the mail. With these goodies you are to complete a layout using, hopefully all of the goodies you were sent or as much as you possibly can.
Additional requirements is to use either a funny photo or serious photo of your loved one. The deadline for submissions is February 26, 2013. Prizes will be offered for the "Best Layout," "Random Draw, " Most Serious Photo," and "Funniest Photo."
This is what I created:
This is a photo of my hubby taken in May 27, 2007. He's not crazy about this photo but I love it!
I used ALL of the goodies I received:
2 Valentine Tickets
Stamped "Love You" Sentiment
Embossed Heart Paper Strip
Mini Sheet of Heart Patterned Paper
Stamped heart
Mini Doily
Baker's Twine
1 set of 3 Flowers
Red Sequins
Lace Fabric
Additional supplied used:
Paper: DCWV, Colorbok, Other
Vellum Paper
Clear Plastic Heart
Hearts (on banner) & Envelopes cut from pp
Other Hearts were Stamped
Ink: A la mode Red
Color Mists: Wilton
Mister Huey's Color Mists
Perfect Pearls Mists
These hearts were traced onto the hearts paper that I received, hand cut and inked. The background paper was misted with several different mists.
I used the sentiment as my title, adhering it onto vellum and then onto a strip of the lace fabric.
From the embossed strip of paper, which I cut a small piece off one end, I cut out the heart and inked the edges, placing it onto the "o" in the word "Love."
Here's a better look at my title block.
I used the strip of sequins as the banner. The long, narrow hearts were stamped, the larger center heart and envelopes were cut from pp. I added a couple strips of the lace fabric onto the banner also.
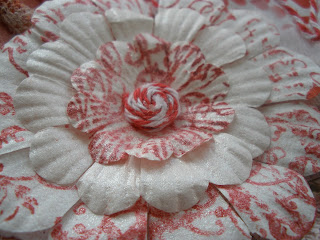
The embossed strip of paper is under this grouping. You can just see the end of it on the left. All pieces were misted. I started with the doily, added a circle from the hearts pp and another circle of the lace fabric. The flower petals were curled under a bit for more dimension. The brad that I received holding the flowers together was a bright blue, so I used the remaining twine, wrapping it over until it was completely covered.
More details to follow:
The clear plastic heart was trimmed with the twine. The tickets were added just under the flowers. The stamped heart was added under the doily.
A side angle of my banner.
I cut the remaining lace fabric into strips and rolled them, tucking them under the flowers. The lace was also misted.
A better look at the tickets. Two additional strips of lace were rolled to tuck under the other side of the flower.
I had these cute clear plastic hearts in my "Valentine's" stash. I was equally pleased that the twine made it around the heart too!
The stamped heart was misted and the edges inked.
Here's a closer look at a portion of my banner.
A look at the right side of the page.
Here's a closer look at the twine-covered brad. Love how this turned out!
Have a wonderful day!

.jpg)
.jpg)
.jpg)
.jpg)
.jpg)
.jpg)
.jpg)
.jpg)
.jpg)
.jpg)
.jpg)
.jpg)
.jpg)

Fantastic layout! Love all the elements and fun details!!!
ReplyDelete